Tier 1
Train + Serve
7900 XTX · MI210
train
serve
Flash a USB, boot the AMD box, open the local web app. Models run offline.
Compatibility depends on the card, driver, model, and available memory. Check before release use.
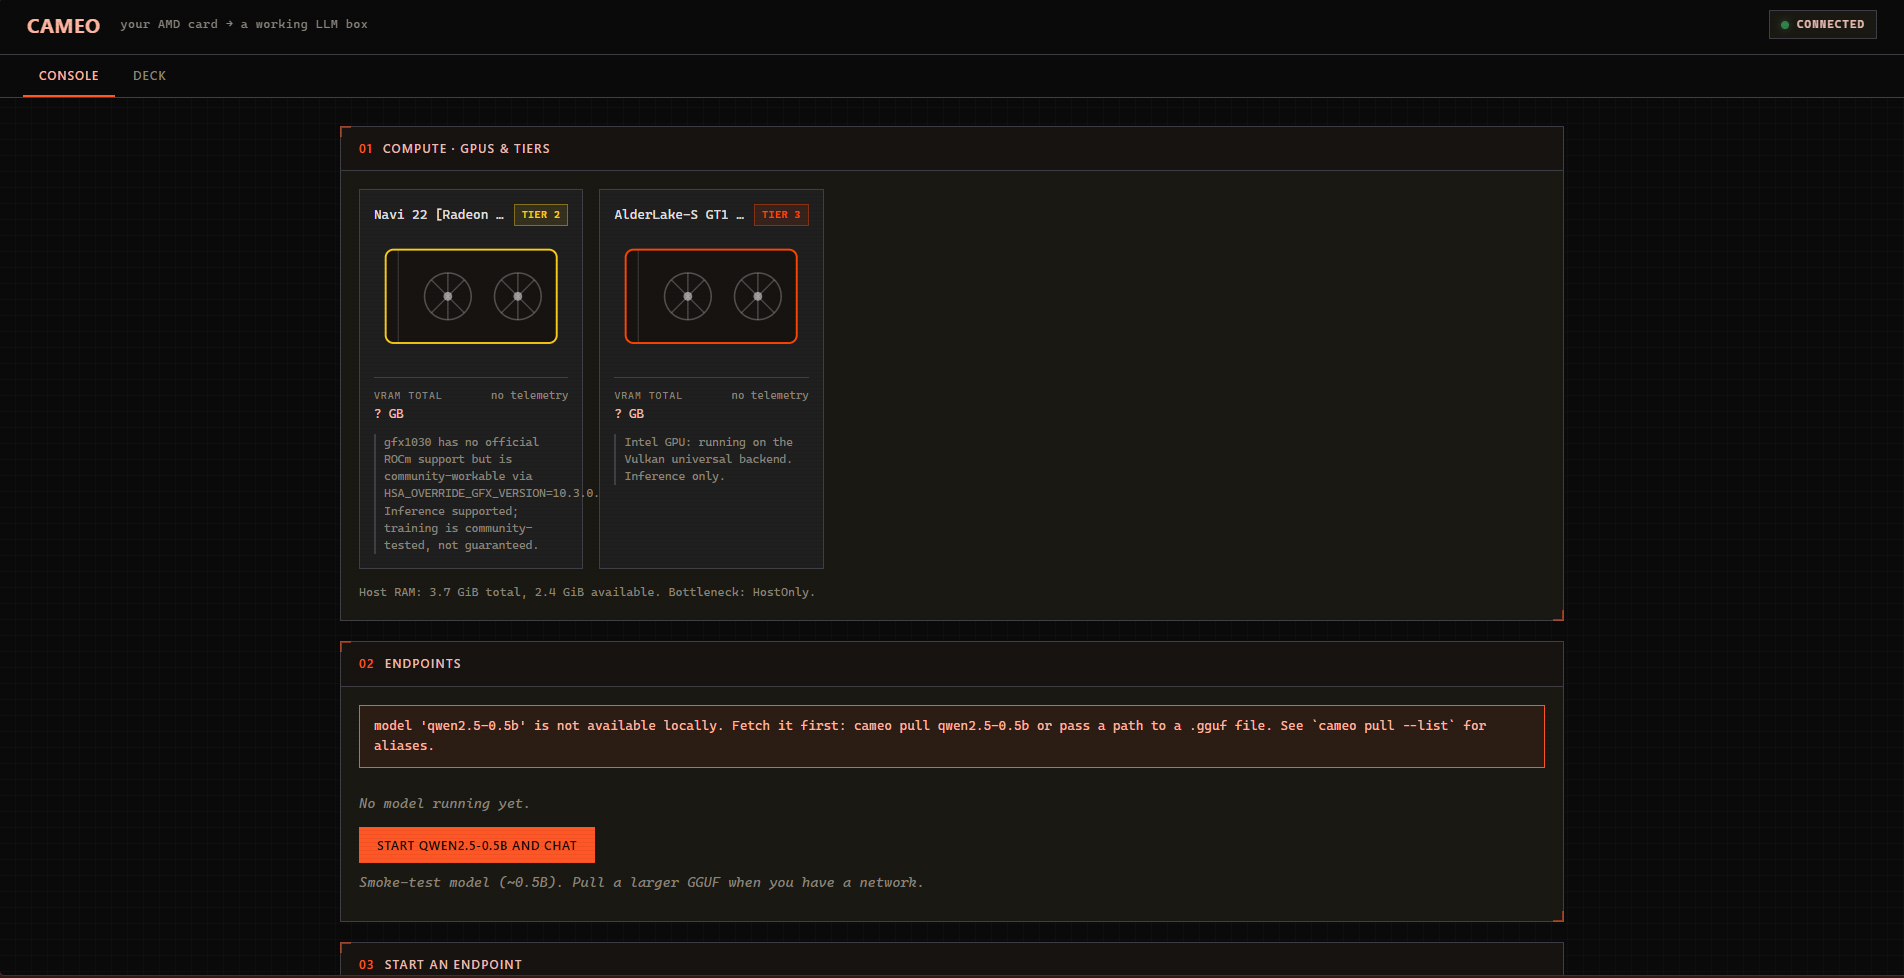
01how
cameo.local:9090That’s the product. After login the box prints that URL. The screenshot above is the real console, not a mock.
02tiers
Tier 1
7900 XTX · MI210
Tier 2
RX 6800 · 6700 XT
Tier 3
RX 580 · APUs
03get it
Candidate build passed Both Cameo images built successfully on Sep 9, 2026 from commit 95724ee. The workflow passed image checks, required-file checks, and a QEMU userspace boot. This is a CI candidate, not yet a tagged release or AMD hardware qualification.
Primary appliance candidate. Vulkan is the broad compatibility path; ROCm is included for supported AMD hardware.
GitHub sign-in may be required. The artifact includes its SHA-256 checksum.
Smaller candidate for known Vulkan-only and lower-end AMD systems. It carries the same Cameo and Knossos runtime.
GitHub sign-in may be required. The artifact includes its SHA-256 checksum.
Next beta: v0.2.0-beta.2. Needs a model — Ollama, Anthropic, Gemini, Groq, or a running Cameo box. Matching standalone artifacts are being rebuilt; no mislabeled binary is offered here. A Windows paired-control reward-eval ran on 2026-09-08 against gemini-3.6-flash; both arms stopped on token-budget and tool-calling failures before 8/8, so that run is retained evidence, not a capability score.
Knossos 0.2.0-beta.2 CLI plus constitution and license. Build pending. Source-tree tests passed; the live 8-case matrix did not complete.
View Knossos releasesA download appears only after its version and checksum pass the release gate.
Windows: Rufus in DD Image mode (ISO mode often will not boot), or Etcher. Linux/macOS: Etcher, or:
sudo dd if=cameo-*.iso of=/dev/sdX bs=4M status=progress oflag=sync
Disable Secure Boot (or the stick is ignored and Windows boots). Put the USB in the AMD machine. Install Cameo to disk is already the default entry. It shows the detected GPU and tier, then asks for:
This installer erases the disk you pick
The selected drive is wiped — partitions, Windows, everything. There is no undo. Nothing is touched until you pick a disk, review the plan, and type that disk’s name (for example sda) to confirm.
Nothing is downloaded. The installer copies the live image onto that disk, writes a console key, and enables cameod. Then reboot and pull the USB.
From a laptop or phone on the same LAN (plug the box into Ethernet if it has a port), open the URL printed after login — http://cameo.local:9090 or the IP. Enter the key. Start qwen2.5-0.5b (smoke test, already on disk). Chatting never phones home. Extra GGUFs: drop them in /var/lib/cameo/models.
A single box does not need Wi-Fi. Cameo Link joins it to a request-level pool; Mesh does not combine VRAM or shard one inference across machines.
iwctl
  station list
  station wlan0 scan
  station wlan0 get-networks
  station wlan0 connect 'YourSSID'
Pair Cameo Link to the hub with a single-use code. Request routing and pairing are preview; mutual TLS is not available yet. One machine, one card, one house can stay offline after you flash.
Container — host owns the GPU driver:
podman build -f containers/Containerfile -t cameo:vulkan .
podman run --rm -p 9090:9090 \
  -v cameo-models:/var/lib/cameo/models \
  --device=/dev/kfd --device=/dev/dri \
  --group-add video --group-add render \
  cameo:vulkan
Build the ISO on an Arch host:
git clone https://github.com/sadlowskik/Cameo
sudo ./scripts/build-iso.sh
sudo CAMEO_EDITION=lite ./scripts/build-iso.sh
Beta, pre-v1. Flash an .iso, not Source code. Check SHA256SUMS. The disk installer erases the drive you pick. Source: github.com/sadlowskik/Cameo.